

If you’re planning to create a website for your business, portfolio, blog, coaching institute, or online store, the first thing you’ll need is a domain name and web hosting.
Many beginners get confused when they visit hosting websites because there are multiple plans, features, and technical terms. In this guide, I’ll show you the exact process I use to buy a domain and hosting from Hostinger.
By the end of this article, you’ll be ready to launch your website in less than 30 minutes.
What You Need Before Buying a Domain & Hosting
Before purchasing hosting, keep these things ready:
✅ Your website name
✅ Email address
✅ Debit Card, Credit Card, UPI, or Net Banking
✅ Basic idea of your website purpose
Examples:
- Business Website
- Blog Website
- School Website
- Portfolio Website
- eCommerce Store
Step 1: Go to Hostinger – Best Hosting for Beginners
Go to the Hostinger website
You’ll see different hosting plans designed for beginners, businesses, and growing websites.
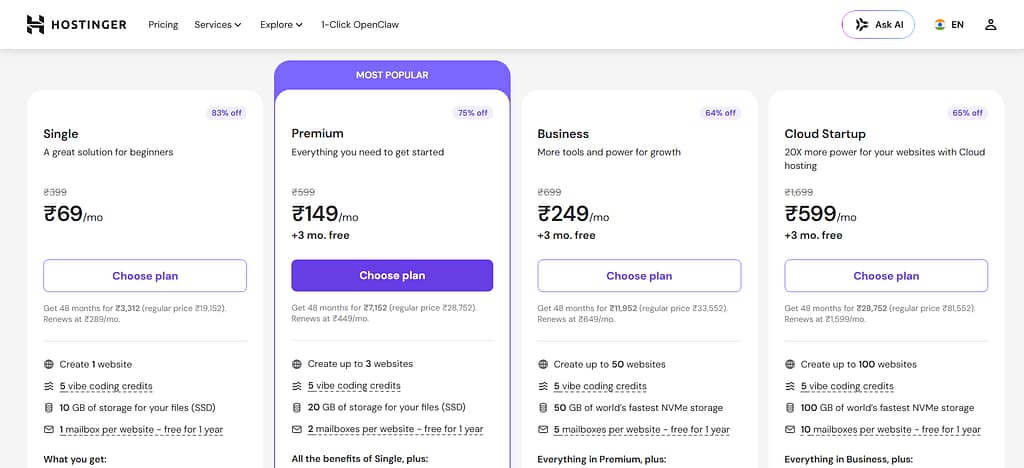
Step 2: Choose the Right Hostinger Hosting Plan
For most beginners, I recommend starting with the Premium Web Hosting Plan.
Why?
✔ Host up to multiple websites
✔ Free SSL Certificate
✔ Free Professional Email
✔ Easy WordPress Installation
✔ Beginner-Friendly Dashboard
✔ Good Website Speed
If you’re creating a small business website, coaching website, portfolio, or blog, the Premium Plan is usually enough.
Step 3: Select Hosting Duration
Hostinger usually offers options like:
- 12 Months
- 24 Months
- 48 Months
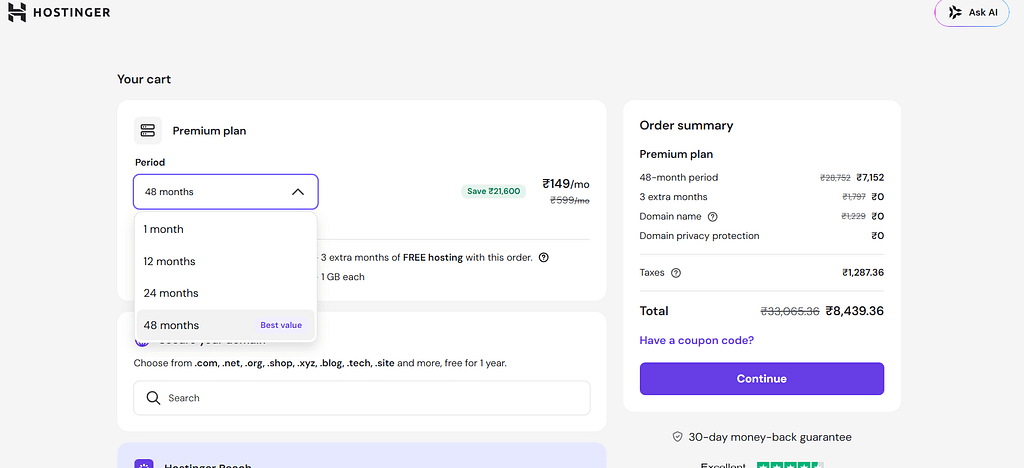
Longer plans generally provide better discounts.
If you’re serious about your website, choose a longer-term plan to save money.
After selecting the duration, click Continue.
Step 4: Create Your Hostinger Account
Now you’ll be asked to create an account.
You can sign up using:
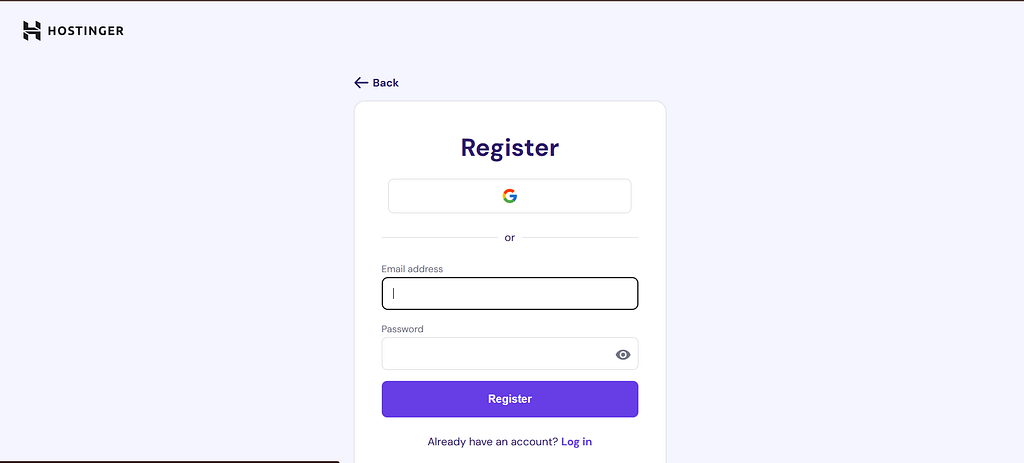
- Email Address
- Google Account
- Facebook Account
Enter your details and continue.
Step 5: Get Your Free Domain Name with Hostinger
One of the biggest advantages of Hostinger is that many hosting plans include a free domain for the first year.
Now Hostinger will ask:
“Choose Your Domain Name“
Example:
- yourbusiness.com
- sonusenglishacademy.com
- yourbrand.in
Type your desired domain name and check availability.
If available, click Claim Domain.
Step 6: Complete Payment
Now proceed to checkout.
Available payment methods usually include:
✔ UPI
✔ Debit Card
✔ Credit Card
✔ Net Banking
✔ Wallet Payments
Review your order summary and complete the payment.
Once payment is successful, your hosting account will be activated automatically.
Step 7: Verify Domain Ownership
Hostinger may send a verification email.
Open your email inbox and click the verification link.
This step is important because unverified domains can be suspended.
Step 8: Set Up Your Hostinger hPanel Dashboard
After successful payment, log in to your Hostinger account.
You’ll see the Hostinger Dashboard (hPanel).
From here, you can manage:
- Domains
- Hosting
- Emails
- SSL Certificates
- Website Files
- Databases
This is the control center of your website.
Once your hosting is ready, you’ll need to design your website. Check out our Website Design services or read our guide on…